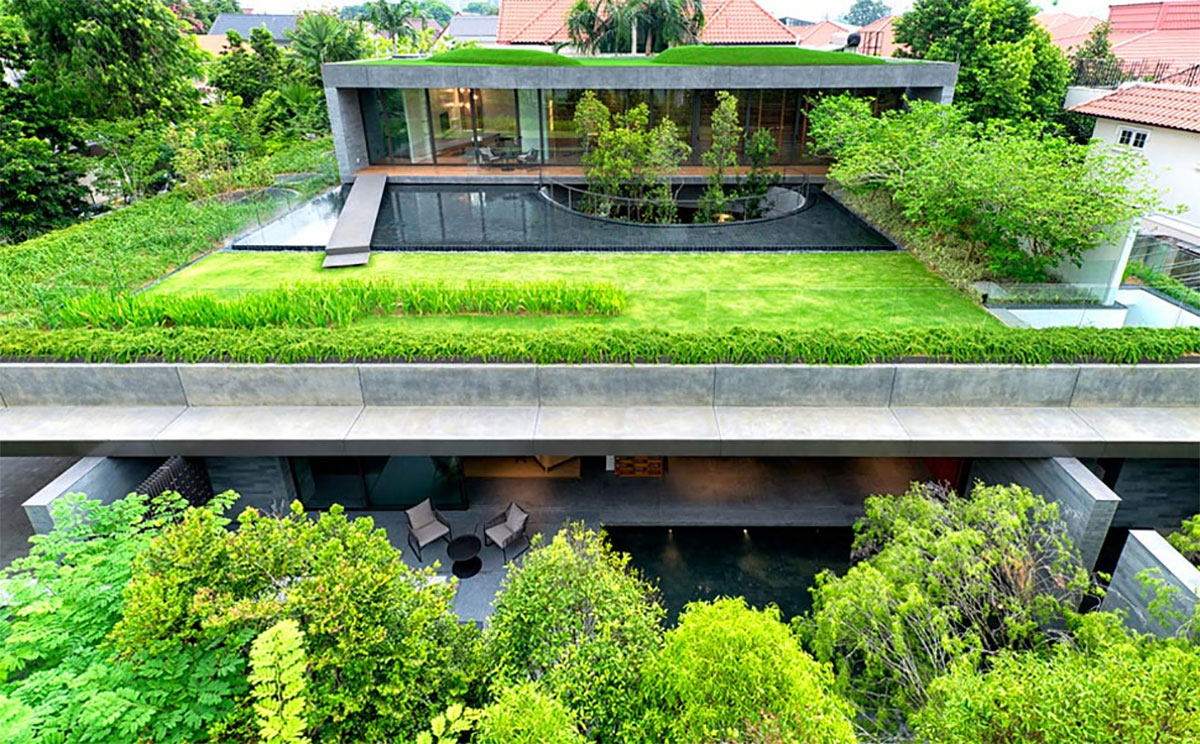
Roof garden waterproofing is essential to protect the underlying structure, prevent water leakage, and create a thriving outdoor space. By employing proper techniques and materials, such as high-quality membranes, effective drainage systems, and regular maintenance, a durable and functional roof garden can be achieved.
Roof garden waterproofing benefits
Waterproofing of roof garden offers several benefits that contribute to the overall functionality and longevity of a rooftop garden. Here are some key advantages:
- Leakage Prevention: Waterproofing membranes or coatings create a barrier that prevents water from seeping into the underlying structure. This protects the roof and the building from damage caused by water leakage, such as structural deterioration, mold growth, and interior water damage.
- Enhanced Structural Integrity: By sealing the roof surface, waterproofing helps to maintain the structural integrity of the building. It prevents water from infiltrating the roof, which can cause weakening of the building materials over time.
- Extended Roof Lifespan: Waterproofing systems protect the roof from external elements, including moisture, sunlight, and temperature fluctuations. This helps to extend the lifespan of the roof, reducing the need for frequent repairs or premature roof replacement.
- Improved Energy Efficiency: Waterproofing membranes or coatings can enhance the insulation properties of the roof. By reducing heat transfer and minimizing thermal bridging, they contribute to improved energy efficiency, reducing the need for excessive heating or cooling and thereby lowering energy costs.
- Environmental Benefits: Roof gardens provide numerous ecological advantages, such as reducing the urban heat island effect, improving air quality, and promoting biodiversity. Waterproofing ensures that the rooftop garden functions optimally by preventing water leakage that could damage the underlying structure and compromise the ecological benefits.
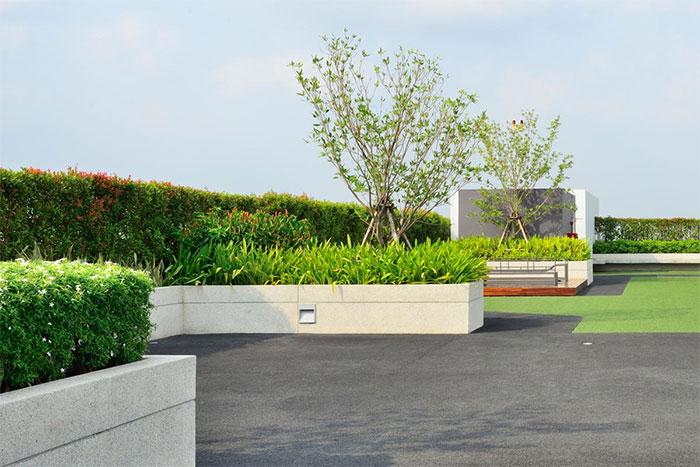
- Aesthetic Appeal: Waterproofing systems can be combined with various finishing materials to create an aesthetically pleasing rooftop garden. The waterproofing layer serves as a protective base for the garden, allowing for the installation of walkways, planters, and other landscaping features.
- Increased Property Value: Roof gardens are highly desirable in urban environments, as they provide additional usable space and contribute to the overall value of the property. Proper waterproofing ensures the long-term functionality and durability of the rooftop garden, enhancing its appeal and potentially increasing the property’s market value.
Read more: Roof Sealing Using Geosynthetics
Requirements for waterproofing a roof garden
When waterproofing a roof garden, several requirements should be considered to ensure effective and long-lasting protection. Here are some key requirements for waterproofing a roof garden:
- Professional Assessment: Engage the services of a qualified professional or waterproofing expert to assess the roof structure and determine the specific waterproofing needs of your roof garden. They can identify potential vulnerabilities and recommend suitable waterproofing methods.
- Quality Waterproofing Membrane: Select a high-quality waterproofing membrane specifically designed for rooftop applications. The membrane should be durable, flexible, and resistant to UV radiation and weathering. Common options include modified bitumen, thermoplastic membranes (PVC or TPO), or liquid-applied membranes (e.g., acrylic or polyurethane).
- Proper Surface Preparation: Ensure that the roof surface is clean, dry, and free from debris, dirt, or loose materials. Any existing cracks or damaged areas should be repaired before applying the waterproofing membrane. Surface preparation may involve cleaning, priming, and leveling as necessary.
- Adequate Drainage System: Proper drainage is critical for roof gardens to prevent water accumulation and potential damage. Install a reliable and efficient drainage system that directs water away from the roof surface. This typically includes a combination of gutters, downspouts, scuppers, and drainpipes.
- Root Barrier: Incorporate a root barrier layer in the waterproofing system to prevent plant roots from penetrating and damaging the waterproofing membrane. This is particularly important for green roofs where vegetation is directly installed on the roof surface.
- Sealing Penetrations and Joints: Pay attention to sealing penetrations, such as pipes, vents, or skylights, as well as joints and seams in the waterproofing membrane. Use appropriate sealants or flashing materials to ensure watertight connections and prevent water ingress.
- Protection Layer: Consider adding a protective layer over the waterproofing membrane to shield it from potential damage during installation or maintenance activities. This layer may consist of geotextile fabric, drainage panels, or insulation materials, depending on the specific requirements of the roof garden.
- Regular Maintenance: Implement a regular maintenance plan to inspect and maintain the roof garden and its waterproofing system. This includes removing debris, checking for any signs of damage or wear, and promptly addressing any issues to prevent water leakage and ensure long-term performance.
- Compliance with Local Regulations: Ensure compliance with local building codes, regulations, and guidelines related to waterproofing and roof garden installations. Obtain necessary permits and follow best practices to meet safety and structural requirements.
Read more: Greenhouses waterproofing using Geomembrane
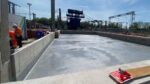
Terrace roof garden waterproofing process
The process of waterproofing a terrace roof garden typically involves several steps to ensure effective protection against water leakage. Here is a general outline of the terrace roof garden waterproofing process:
- Surface Preparation: Thoroughly clean the terrace roof surface, removing any debris, dirt, or loose materials. It is essential to have a clean and dry surface before starting the waterproofing process.
- Repair and Patching: Inspect the terrace roof for any cracks, holes, or damaged areas. Repair these areas using appropriate patching compounds or fillers to ensure a smooth and even surface.
- Application of Primer: Apply a suitable primer to the prepared terrace roof surface. The primer helps to enhance the adhesion of the waterproofing membrane to the substrate and improves the overall effectiveness of the waterproofing system.
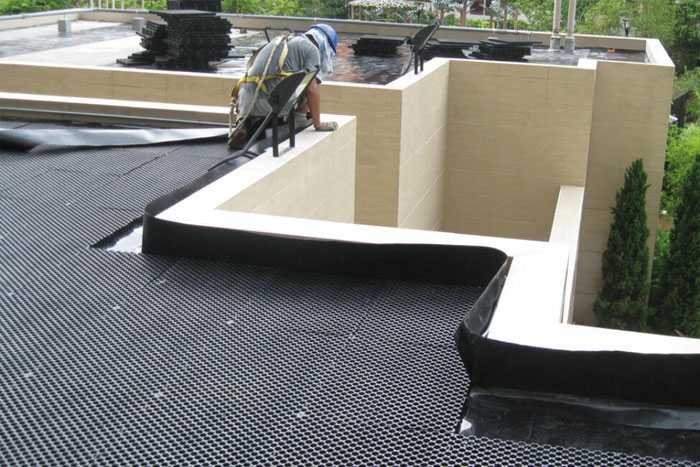
- Waterproofing Membrane Installation: Install the waterproofing membrane according to the manufacturer’s instructions. The type of membrane used may vary depending on the specific requirements and preferences, such as modified bitumen sheets, thermoplastic membranes, or liquid-applied membranes.
- For modified bitumen sheets: Apply hot or cold adhesive to the terrace roof surface and carefully lay down the modified bitumen sheets, ensuring proper overlap and alignment. Use a torch to heat-weld the seams and create a continuous, watertight seal.
- For thermoplastic membranes: Unroll the thermoplastic membrane onto the primed surface, ensuring proper alignment and overlap. Heat-weld the seams using specialized equipment to create a strong and seamless bond.
- For liquid-applied membranes: Apply the liquid membrane using a brush, roller, or spray equipment, ensuring a consistent and even coverage. Multiple layers may be required to achieve the desired thickness and waterproofing performance.
- Flashing and Joint Sealing: Install flashing materials around penetrations, such as pipes, vents, or skylights, to create watertight seals. Seal all joints, edges, and seams of the waterproofing membrane using appropriate sealants or tapes to prevent water infiltration.
- Root Barrier Installation (for green roofs): If the terrace roof garden will have vegetation directly installed on the surface, incorporate a root barrier layer to prevent plant roots from penetrating and damaging the waterproofing membrane.
- Drainage System Installation: Install a proper drainage system on the terrace roof to ensure efficient water flow and prevent water accumulation. This may include the installation of gutters, downspouts, drainpipes, and other drainage components.
- Protective Layer Installation: Consider adding a protective layer over the waterproofing membrane to provide additional protection against potential damage during installation or maintenance activities. This layer may consist of geotextile fabric, drainage panels, or insulation materials.
- Quality Assurance and Inspection: Conduct thorough quality assurance checks and inspections to ensure the waterproofing system is properly installed and meets the required standards. Address any deficiencies or issues promptly before proceeding with the construction of the roof garden.
- Regular Maintenance: Implement a regular maintenance plan for the terrace roof garden and its waterproofing system. Regularly inspect the area, remove debris, and perform necessary repairs or maintenance to ensure the long-term effectiveness of the waterproofing.
Read more: Geosynthetics in artificial grass underlayment
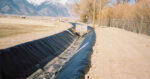
Waterproofing a roof garden using geosynthetics
Geosynthetic products can be utilized in the waterproofing process of a roof garden to enhance the effectiveness and longevity of the waterproofing system. Here’s an overview of how geosynthetics can be incorporated into the waterproofing of a roof garden:
- Geotextile Fabric: Geotextile fabric is a commonly used geosynthetic material in roof garden waterproofing. It acts as a protective layer between the waterproofing membrane and the overlying soil or drainage components. The geotextile fabric helps to prevent the intrusion of fine soil particles or clogging of the drainage system, while still allowing water to pass through. It improves the overall stability and performance of the roof garden system.
- Drainage Composite: Geosynthetic drainage composites, also known as geocomposite drains, can be employed to enhance the drainage capacity of the roof garden. These composites typically consist of a geotextile fabric bonded to a core of drainage material, such as a geonet or geospacer. When installed beneath the soil layer, they provide a pathway for excess water to flow away from the roof surface, reducing the risk of water accumulation and potential damage to the waterproofing membrane.
- Protection Mat: Geosynthetic protection mats or geocells can be used to safeguard the waterproofing membrane from potential damage during the construction or maintenance of the roof garden. These mats provide a cushioning effect and distribute the load of foot traffic, equipment, or landscaping elements, reducing the stress on the waterproofing layer. They help to prevent punctures, abrasions, or other mechanical damage to the membrane, ensuring its long-term durability.
- Root Barrier: In green roof systems, geosynthetic root barriers are installed to prevent the intrusion of plant roots into the waterproofing layer. These barriers are typically made of high-density polyethylene (HDPE) or other durable materials that are resistant to root penetration. The root barrier acts as a protective barrier, preserving the integrity of the waterproofing membrane and reducing the risk of water leakage or damage caused by plant roots.
Conclusion
In conclusion, roof garden waterproofing is a crucial aspect of creating a functional and durable rooftop garden. By implementing proper waterproofing techniques and materials, several benefits can be achieved. These include preventing water leakage and damage to the underlying structure, extending the lifespan of the roof, improving energy efficiency, enhancing the aesthetic appeal of the garden, and increasing property value.