In this blog post, we will share practical tips and best practices that will help you keep your geomembrane liner in top condition, extending its lifespan and ensuring it functions as intended. From proper installation techniques to regular inspections and timely repairs, these tips will guide you in maintaining the integrity and performance of your geomembrane sheets.
The importance of geomembrane liner maintenance
Geomembrane liner maintenance is crucial for ensuring the long-term performance and effectiveness of geomembrane liners. Here are some key reasons why geomembrane liner maintenance is important:
- Leak Prevention: Geomembrane liners act as a primary barrier to contain liquids or gases. Regular inspections and maintenance activities can detect early signs of damage, such as punctures, tears, or seam failures.
- Structural Integrity: Geomembranes are often exposed to harsh environmental conditions, including UV radiation, temperature fluctuations, and chemical exposure. Maintenance activities such as cleaning, repairing damaged areas, and reinforcing weak spots help maintain the liner’s structural integrity, ensuring its effectiveness over time.
- Compliance with Regulations: Many applications of geomembrane liners are subject to regulatory requirements and standards. Regular maintenance helps ensure compliance with these regulations, avoiding penalties and legal issues.
- Cost Savings: Early detection and repair of geomembrane liner damage can prevent more extensive and costly repairs or replacements in the future. By investing in routine maintenance, potential issues can be addressed promptly, minimizing the risk of expensive remediation efforts or operational disruptions.
- Environmental Protection: Geomembrane liners are commonly used in applications where the containment of hazardous substances is critical. Proper maintenance reduces the risk of leaks and spills, protecting the environment, groundwater resources, and surrounding ecosystems from contamination.
- Longevity and Performance: Regular maintenance helps extend the lifespan of geomembrane liners. By addressing minor issues promptly, the liner’s performance and durability can be preserved, allowing it to fulfill its intended function for an extended period.
Techniques of Geomembrane liner maintenance
Geomembrane liner maintenance involves a variety of techniques aimed at preserving the integrity and performance of the liner. Here are some common techniques used in geomembrane liner maintenance:
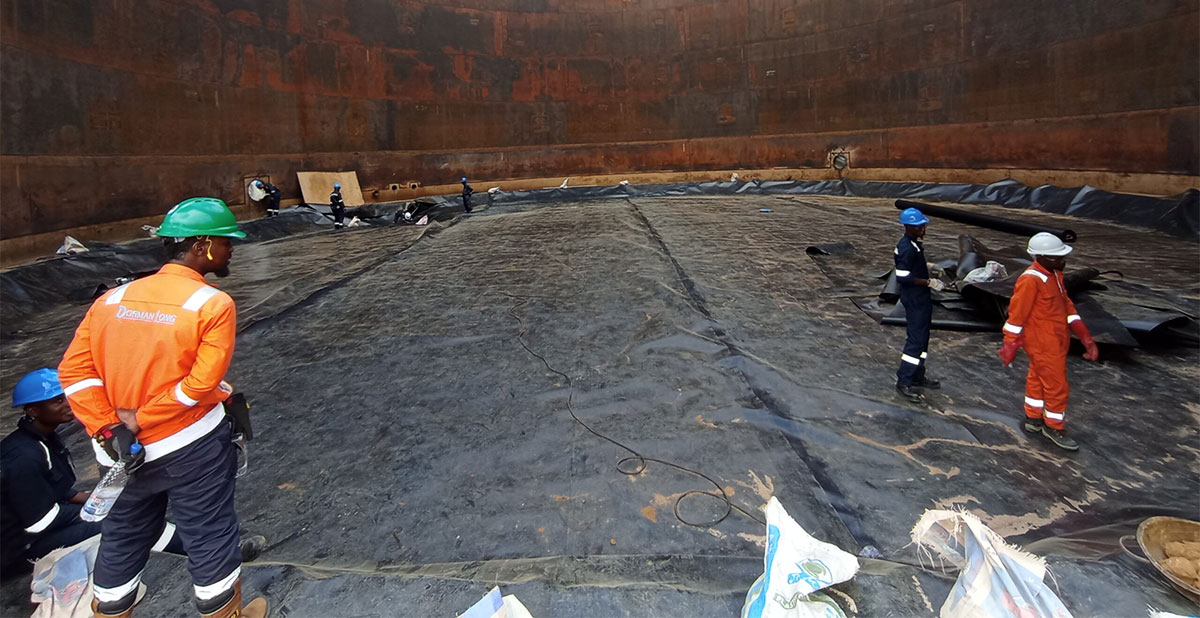
- Geomembrane inspection: Regular visual inspections are essential for identifying any visible signs of damage, wear, or deterioration. Trained personnel should inspect the liner surface, seams, and connections for issues such as punctures, tears, stress cracking, or signs of degradation.
- Leak Detection Surveys: Conducting leak detection surveys can help identify potential leaks or areas of concern that may not be visible during visual inspections. Techniques such as electronic leak detection (ELD), vacuum box testing, or dye testing can be employed to locate leaks or breaches in the geomembrane liner.
- Cleaning: Proper cleaning of the geomembrane liner is essential to maintain its performance and prevent the accumulation of debris or substances that may degrade the liner over time.
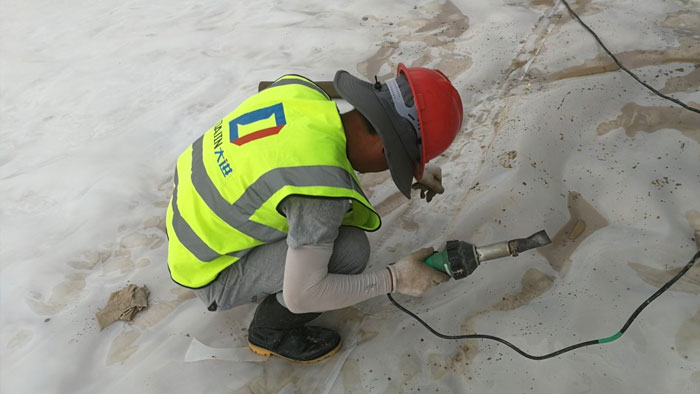
- Repair and Patching: When damage or defects are identified during inspections, timely repairs should be carried out to prevent further deterioration. Small punctures or tears can be repaired using patching materials compatible with the geomembrane liner material.
- Seam Integrity Checks: Seams are critical areas in geomembrane liners, and their integrity should be regularly assessed. Non-destructive testing methods, such as air lance or vacuum testing, can be used to evaluate the quality and strength of the seams.
- Dealing with Vegetation: Uncontrolled vegetation growth on or near the geomembrane liner can pose a risk of damage, as roots may penetrate the liner. Implementing vegetation management practices, such as regular mowing, herbicide application, or installation of root barriers, can help mitigate this risk.
- Monitoring and Recordkeeping: Keeping detailed records of maintenance activities, inspections, repairs, and testing results is crucial for tracking the condition of the geomembrane liner over time.
Tools for Geomembrane liner maintenance
Here are some essential tools and equipment commonly used for geomembrane liner maintenance:
- Inspection Tools:
- Visual Inspection Equipment: Binoculars, magnifying glasses, and cameras for detailed visual checks.
- Holiday Detectors: Devices that detect pinholes or flaws in non-conductive coatings.
- Ultrasonic Thickness Gauges: To measure the thickness of the geomembrane and detect inconsistencies.
- Thermal Cameras: To identify leaks or areas of heat loss.
- Repair Tools:
- Hot Air Welders: For welding patches or seams in thermoplastic geomembranes.
- Extrusion Welders: For larger or more complex repair jobs.
- Geomembrane Patch Kits: Pre-made patches with adhesives for quick fixes.
- Hand Rollers: To ensure proper adhesion of patches and seams.
- Cutting Tools: Knives, scissors, and shears for cutting geomembrane materials.
- Cleaning and Preparation Tools:
- Surface Cleaners: Brushes, brooms, and blowers to remove debris and contaminants.
- Solvents and Primers: For cleaning and preparing surfaces before repairs.
- Sandbags or Weights: To secure the geomembrane during cleaning and repair.
- Testing and Monitoring Equipment:
- Pressure Testing Kits: For testing the integrity of welded seams.
- Vacuum Boxes: To check for leaks in seams and patches.
- Water Lance Testing: For checking the integrity under water pressure.
- Electrical Leak Location Systems: To detect and locate leaks using electrical currents.
- Safety Equipment:
- Personal Protective Equipment (PPE): Gloves, safety glasses, helmets, and protective clothing.
- Ventilation Fans: For ensuring adequate ventilation in confined spaces.
- First Aid Kits: For handling minor injuries during maintenance work.
- Documentation and Reporting Tools:
- Inspection Forms and Checklists: For recording and tracking maintenance activities.
- Digital Cameras and Tablets: For documenting conditions and repairs.
- Drones: For aerial inspections and documentation of large areas.
- Miscellaneous Tools:
- Tape Measures: For measuring areas and dimensions.
- Chalk Lines and Markers: For marking areas for repair or inspection.
- Ladders and Scaffolding: For accessing elevated or hard-to-reach areas.
How to Fix Common Issues of Geomembrane liner maintenance
Here’s a guide on how to fix these common issues:
1. Punctures and Tears
Detection:
- Visual Inspection: Look for visible holes, tears, or damage.
- Leak Detection Systems: Use electrical leak location systems or water lance testing.
Tools Needed:
- Hot air welder or extrusion welder
- Geomembrane patch material
- Hand roller
- Cleaning solvents and brushes
Repair Steps:
- Clean the Area: Remove any debris, dirt, or contaminants around the damaged area using cleaning solvents and brushes.
- Cut a Patch: Cut a patch from the same geomembrane material, ensuring it is at least 6 inches larger than the damaged area on all sides.
- Prepare the Surface: Roughen the area around the damage and the patch surface using sandpaper for better adhesion.
- Apply Heat: Use a hot air welder to heat both the patch and the liner surface.
- Attach the Patch: Place the heated patch over the damaged area and use a hand roller to press it down firmly, ensuring no air bubbles are trapped.
- Cool and Inspect: Allow the patch to cool and inspect the repair for any gaps or flaws.
2. Seam Failures
Detection:
- Visual Inspection: Check for gaps or inconsistencies along the seams.
- Vacuum Box Testing: Apply a vacuum box over the seams to detect leaks.
Tools Needed:
- Extrusion welder or hot wedge welder
- Hand roller
- Vacuum box
Repair Steps:
- Clean the Seam Area: Use cleaning solvents to clean the seam thoroughly.
- Re-weld the Seam: Use a hot wedge or extrusion welder to re-weld the seam. Make sure to follow the manufacturer’s welding procedure.
- Use Hand Roller: Apply a hand roller over the welded area to ensure a strong bond.
- Test the Seam: Use a vacuum box to test the seam for leaks. If any are found, repeat the welding process.
3. Surface Contamination
Detection:
- Visual Inspection: Look for dirt, algae, oil, or other contaminants on the liner surface.
Tools Needed:
- Brushes and brooms
- Cleaning agents and solvents
- Pressure washer (if applicable)
Cleaning Steps:
- Remove Loose Debris: Use brooms and brushes to sweep away loose debris.
- Apply Cleaning Agents: Use appropriate cleaning agents and solvents to break down oils, algae, and other stubborn contaminants.
- Scrub the Surface: Use brushes to scrub the liner surface thoroughly.
- Rinse: If allowed, use a pressure washer to rinse off the cleaning agents and debris. Otherwise, use clean water and brushes.
4. Wrinkles and Waves
Detection:
- Visual Inspection: Look for visible wrinkles or waves on the liner surface.
Tools Needed:
- Sandbags or weights
- Hand roller
Correction Steps:
- Reposition the Liner: Lift and reposition the liner to eliminate wrinkles and waves.
- Apply Weights: Use sandbags or weights to hold the liner in place and smooth out wrinkles.
- Roll the Surface: Use a hand roller to smooth out any remaining wrinkles or waves.
5. Displacement and Slippage
Detection:
- Visual Inspection: Observe the liner for any signs of movement or displacement.
Tools Needed:
- Anchoring systems (e.g., trenching, ballast)
- Sandbags or weights
Correction Steps:
- Re-anchor the Liner: Re-secure the liner using appropriate anchoring methods, such as trenching or adding ballast.
- Apply Weights: Place sandbags or other weights to hold the liner in place.
- Monitor Regularly: Regularly inspect the liner to ensure it remains in position.
Best Practices for Prolonging Lifespan Geomembrane liner
Here are some best practices to ensure their longevity:
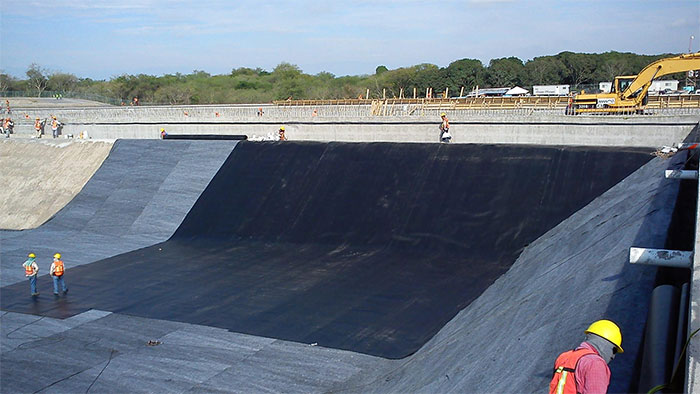
1. Proper Installation
Site Preparation:
- Clear the Site: Remove all sharp objects, rocks, and debris that could puncture the liner.
- Smooth the Subgrade: Ensure the subgrade is smooth and free of irregularities. Consider using a geotextile underlay for additional protection.
Installation Techniques:
- Avoid Stretching: Do not overstretch the geomembrane during installation to prevent stress and potential tearing.
- Seam Quality: Ensure seams are welded correctly using appropriate techniques, such as hot wedge welding or extrusion welding. Perform destructive and non-destructive testing on seams to ensure integrity.
2. Regular Inspection and Monitoring
Scheduled Inspections:
- Frequent Visual Checks: Conduct regular visual inspections to identify any visible damage, such as tears, punctures, or seam failures.
- Leak Detection: Use leak detection systems (e.g., electrical leak location systems) periodically to identify hidden leaks early.
Documentation:
- Maintain Records: Keep detailed records of all inspections, repairs, and maintenance activities. This helps in tracking the liner’s condition over time.
3. Preventive Maintenance
Surface Cleaning:
- Regular Cleaning: Remove debris, algae, and other contaminants regularly to prevent damage.
- Avoid Harsh Chemicals: Use cleaning agents that are safe for the geomembrane material to prevent chemical degradation.
Damage Prevention:
- Protect from UV Exposure: If the liner is exposed to sunlight, consider using UV-protective coatings or cover the liner with soil, gravel, or other protective materials.
- Control Access: Limit access to the liner area to prevent accidental damage by personnel, animals, or machinery.
4. Environmental and Operational Considerations
Chemical Resistance:
- Choose the Right Material: Select geomembrane materials that are resistant to the chemicals they will be exposed to. Regularly check for chemical compatibility and degradation.
Temperature Control:
- Monitor Temperatures: Ensure that the operating temperatures remain within the specified range for the geomembrane material to prevent thermal damage.
5. Effective Repairs
Timely Repairs:
- Immediate Attention: Address any detected damage promptly to prevent it from worsening.
- Quality Repairs: Use appropriate materials and techniques for repairs. Ensure that repairs are done by trained personnel.
Testing Repairs:
- Post-Repair Inspection: After repairs, conduct tests (e.g., vacuum box testing) to ensure the repair is effective and the liner is leak-free.
6. Training and Supervision
Qualified Personnel:
- Training Programs: Ensure that all personnel involved in the installation, inspection, and maintenance of the geomembrane liners are properly trained.
- Supervision: Regularly supervise the work to ensure adherence to best practices and safety protocols.
7. Environmental Protection
Erosion Control:
- Prevent Erosion: Implement measures to control erosion around the liner area, such as using geotextiles, riprap, or vegetation.
Drainage Management:
- Proper Drainage: Ensure that there is adequate drainage to prevent water accumulation on the liner, which can lead to stress and potential damage.
8. Use of Advanced Technologies
Monitoring Systems:
- Install Sensors: Consider installing sensors for real-time monitoring of the liner’s integrity, including pressure sensors, leak detection sensors, and temperature monitors.
Conclusion
In this blog post we discuss about geomembrane care tips. Maintaining your geomembrane liner is a critical aspect of ensuring its performance and longevity