In this post, we want to provide you a geomembrane installation guidelines
What are the steps of geomembrane installation?
Geomembrane installation steps typically involves the following:
- Site Preparation: The site where the geomembrane is to be installed must be cleared of any debris, rocks, and vegetation. The ground surface should be smooth and level. Any sharp or protruding objects should be removed or smoothed out to prevent damage to the geomembrane.
- Subgrade Preparation: The subgrade must be prepared by compacting the soil to ensure a stable base for the geomembrane. The subgrade should be free of any voids or depressions that would cause it to be stretched or punctured.
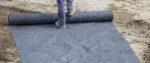
- Geomembrane Unrolling: The geomembrane is unrolled onto the prepared subgrade. It should be unrolled in the direction specified by the manufacturer and according to the design plan. Care should be taken to avoid any wrinkles or folds in the geomembrane.
- Seaming: The geomembrane panels are seamed together using a variety of methods, including heat welding, adhesive bonding, or mechanical fastening. Seams must be inspected to ensure that they are strong and leak-free.
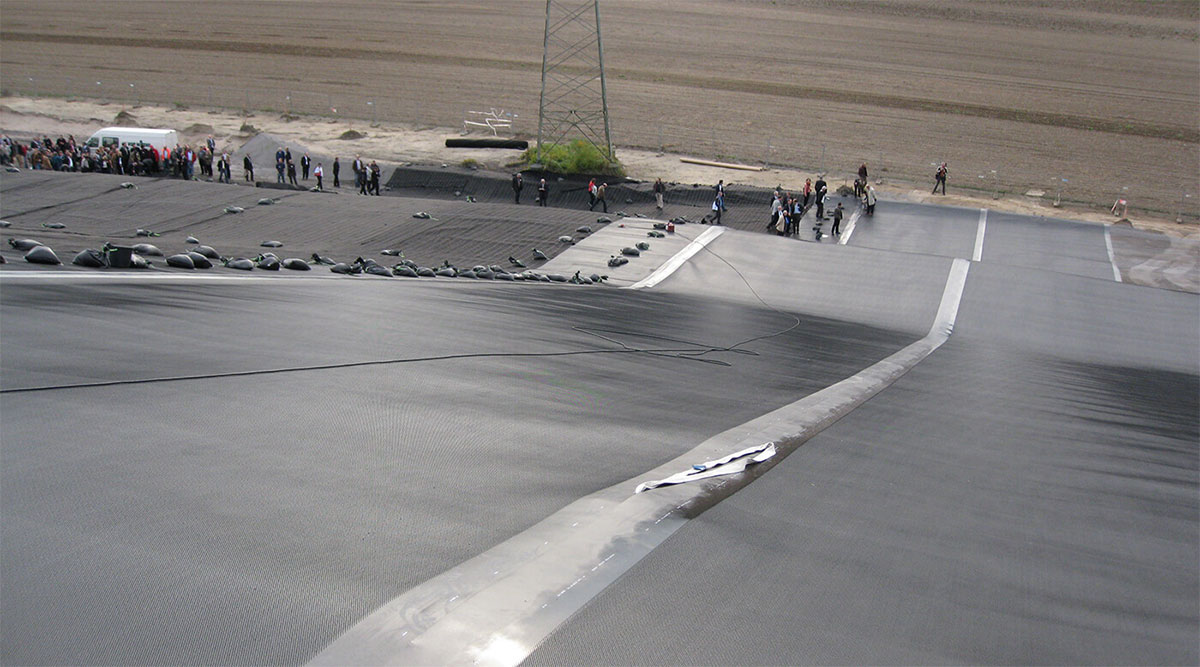
- Anchor Trenching: The edges of the geomembrane are anchored in a trench to prevent uplift due to wind or water. The anchor trench is typically backfilled with soil or a ballast material.
- Testing: The geomembrane installation is tested to ensure that it meets the design specifications and is free of leaks. Testing methods may include air pressure testing, vacuum testing, or electrical leak detection.
- Covering: Once the it is installed and tested, it may be covered with a protective layer of soil, gravel, or other materials, depending on the design requirements.
What specifications should each geomembrane roll have?
Each geomembrane roll should have specific specifications that define its physical and mechanical properties. These specifications are important to ensure that the geomembrane has the necessary strength and durability to perform its intended function. The following are some of the key specifications that each roll should have:
- Thickness: The thickness of the roll is one of the most important specifications. It is typically measured in mils or millimeters and indicates the thickness of the geomembrane material.
- Tensile Strength: Tensile strength measures the ability of the geomembrane to resist stretching or tearing. It is typically measured in pounds per square inch (psi) or kilonewtons per meter (kN/m).
- Tear Resistance: Tear resistance measures the ability of the geomembrane to resist tearing. It is typically measured in pounds-force (lbf) or newtons (N).
- Puncture Resistance: Puncture resistance measures the ability of the geomembrane to resist puncture from sharp objects. It is typically measured in pounds-force (lbf) or newtons (N).
- Chemical Resistance: Chemical resistance measures the ability of the geomembrane to resist degradation from exposure to chemicals. It is typically measured by testing the geomembrane’s performance in contact with specific chemicals.
- UV Resistance: UV resistance measures the ability of the geomembrane to resist degradation from exposure to ultraviolet (UV) radiation. It is typically measured by testing the geomembrane’s performance in accelerated weathering tests.
- Permeability: Permeability measures the ability of the geomembrane to prevent the migration of liquids or gases through the material. It is typically measured using permeability testing methods.

also read: Geocomposite Sheets
What are the common dimensions of geomembrane?
Geomembranes are available in a variety of dimensions to suit different applications. The dimensions can vary in terms of width, length, and thickness. Some common dimensions of are:
- Width: Geomembranes are typically available in widths ranging from 5 to 100 feet (1.5 to 30 meters). The width of the it may depend on the width of the installation site, the size of the containment area, and other factors.
- Length: The length of geomembranes can vary depending on the manufacturer and the specific application. Geomembranes may be available in standard lengths ranging from 50 to 500 feet (15 to 150 meters). Longer lengths may be available for some applications.
- Thickness: The thickness can vary depending on the specific application. Geomembranes may range in thickness from 10 mils (0.25 mm) to 120 mils (3 mm) or more. The required thickness of the geomembrane will depend on the specific requirements of the project, including the expected loads and environmental conditions.
How to choose the best thickness of geomembrane when installation?
Choosing the best thickness of geomembrane for a particular installation involves considering several factors, including the type of containment or lining system, the expected loads and stresses on it, and the environmental conditions. Here are some steps to help choose the appropriate thickness of geomembrane sheet for an installation:
- Determine the type of containment or lining system: Different types of containment or lining systems may require different thicknesses. For example, a landfill liner may require a thicker than a pond liner due to the different loads and stresses on the geomembrane.
- Calculate the expected loads and stresses: The thickness of the geomembrane should be selected based on the expected loads and stresses. This can be calculated using engineering calculations or finite element analysis.
- Consider the environmental conditions: The thickness of the geomembrane should also be selected based on the environmental conditions, such as temperature, UV exposure, and chemical exposure. Some geomembranes may be more resistant to environmental factors than others.
- Consult with a qualified engineer: It is recommended to consult with a qualified engineer who has experience with geomembrane installation. The engineer can help determine the appropriate thickness of it based on the specific requirements of the project.
- Review manufacturer specifications: The manufacturer’s specifications for the geomembrane should also be reviewed to ensure that the selected thickness meets their recommendations.
How to choose the right type of geomembrane in projects?
Choosing the right type of geomembrane for a project involves considering several factors, including the site conditions, type of containment system, expected loads and stresses, and environmental conditions. Here are some steps to help choose the appropriate type of geomembrane for a project:
- Evaluate Site Conditions: The site conditions, such as soil type, slope, and water table depth, can impact the selection of the appropriate type. The site characteristics can help determine the geomembrane’s required strength, durability, and chemical resistance.
- Determine the Type of Containment System: The type of containment system, such as a landfill, pond, or tank, can also impact the selection of the appropriate type. Different types of containment systems require different types of geomembranes with varying properties.
- Calculate the Expected Loads and Stresses: The expected loads and stresses on the geomembrane, such as weight of the contained material or vehicle traffic, can help determine the required thickness and strength of the geomembrane.
- Consider Environmental Conditions: Environmental factors, such as temperature, UV exposure, and chemical exposure, can impact the selection of the appropriate type. Some geomembranes may be more resistant to environmental factors than others.
- Consult with a Qualified Engineer: It is recommended to consult with a qualified engineer who has experience with geomembrane installation.
- Review Manufacturer Specifications: The manufacturer’s specifications for the geomembrane should also be reviewed to ensure that the selected type meets their recommendations.

Equipment required for geomembrane installation
Geomembrane installation requires specialized equipment to ensure that it is installed correctly and efficiently. The specific equipment required may vary depending on the size and complexity of the installation, but here are some common used in geomembrane installation equipment and tools:
- Excavation Equipment: Excavation equipment, such as bulldozers or backhoes, may be required to prepare the site and excavate trenches for the anchor system.
- Welding Equipment: Heat welding equipment is used to join the panels of geomembrane together. The welding equipment may use hot air or a heated tool to melt the surface of the it and create a strong, leak-proof seal.
- Testing Equipment: Testing equipment, such as air or vacuum testing equipment, is used to test the integrity of the geomembrane installation to ensure that it is leak-free.
- Anchoring Equipment: Anchoring equipment, such as sandbags, concrete blocks, or soil, is used to secure the edges of the geomembrane in place and prevent uplift due to wind or water.
- Cutting Tools: Cutting tools, such as utility knives or scissors, are used to cut the geomembrane to the required size and shape.
- Rollers: Rollers are used to smooth out the geomembrane after it is unrolled to prevent wrinkles and ensure a uniform surface.
- Geotextile Fabric: A geotextile fabric may be required to provide cushioning and protection for the geomembrane during installation.
- Safety Equipment: Safety equipment, such as hard hats, safety glasses, gloves, and harnesses, is essential to protect workers during the installation process.
also read: geosynthetic products price
In what environmental conditions should geomembrane be installed?
Here are some environmental conditions to consider when installing geomembranes:
- Temperature: The temperature of the installation site can impact the installation process and the performance of the geomembrane. Geomembranes should be installed when the temperature is within the manufacturer’s recommended range to ensure proper welding and adhesion.
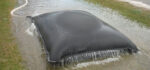
- Moisture: The moisture content of the installation site can impact the stability and performance of the geomembrane. The site should be dry and free of standing water to prevent the formation of wrinkles or bubbles in the geomembrane.
- Wind: Wind can impact the installation process and the stability of the geomembrane during and after installation. The site should be protected from high winds, and anchoring systems should be used to prevent uplift due to wind.
- UV Exposure: UV exposure can cause geomembranes to degrade and reduce their performance over time. They should be installed in a way that minimizes UV exposure, such as covering or installing it below a layer of soil or stone.
- Chemical Exposure: The chemical composition of the contained material can impact the selection of the appropriate type of geomembrane and the installation process. Geomembranes should be selected based on their chemical resistance properties and installed in a way that minimizes chemical exposure.
What preparations should be done before geomembrane installation?
Proper geomembrane installation preparation is essential for a successful ptoject. Here are some of the key preparations that should be done before installing:
- Site Preparation: The site should be cleared of any debris, vegetation, or other obstacles that could interfere with the installation process. The site should also be graded to ensure a smooth surface and proper drainage.
- Soil Compaction: The soil beneath the geomembrane should be properly compacted to prevent settling and ensure a stable foundation for the geomembrane.
- Anchor System: An anchor system should be designed and installed to secure the edges of the geomembrane and prevent uplift due to wind or water. The anchor system should be designed based on the specific site and geomembrane requirements.
- Geotextile Fabric: A geotextile fabric may be required to provide cushioning and protection for the geomembrane during installation. The geotextile fabric should be properly installed and secured to prevent shifting during the installation process.
- Welding Equipment: Heat welding equipment should be properly set up and calibrated before the installation process begins. The welding equipment should be tested to ensure that it is working properly and producing a strong, leak-proof seal.
- Safety Equipment: Workers should be provided with appropriate safety equipment, such as hard hats, safety glasses, gloves, and harnesses, to protect them during the installation process.
- Installation Plan: A detailed installation plan should be developed to ensure that the installation is performed correctly and efficiently. The plan should include a timeline, equipment and material requirements, and quality control procedures.